Introduction
Learning how to create factor variables is indispensable for carrying out many statistical tests. In this blog, you’ll learn how to use R to create factor variables, change the names of factors, and use factors to conduct an ANOVA.
Create a Single Factor
Try the following R code:
height <- factor(c("short","medium","tall"))
print(height)

Factors have levels, as you can see. These levels are part of statistical analyses such as ANOVAs. Let’s see that in action.
Create a Factor in a Data Frame
Try the following R code:
status <- factor(c(rep("single", 10), rep("married",10), rep("divorced",10)))
sat <- rnorm(30, mean=100, sd=15)
satisfaction <- round(sat)
subj <- 1:30
df <- data.frame(subj, status, satisfaction)
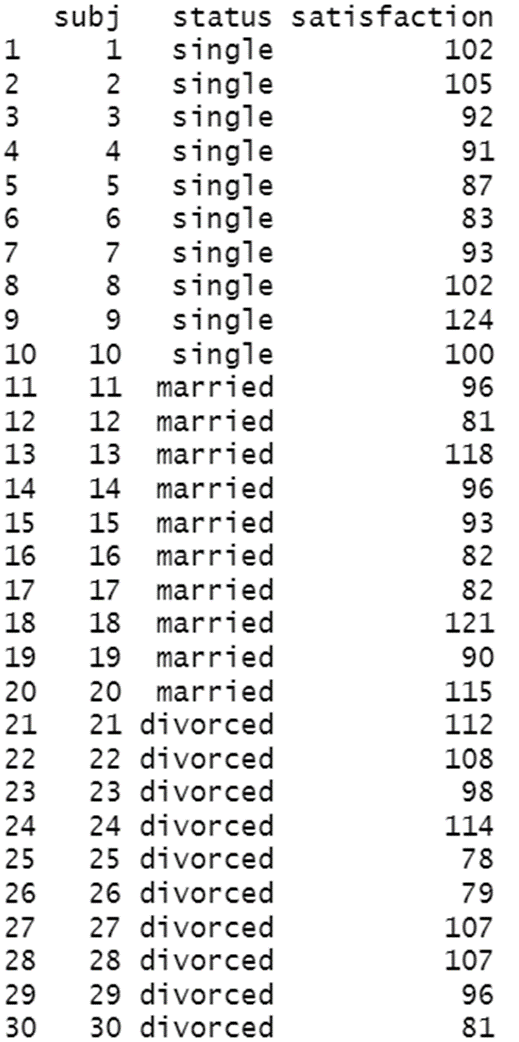
print(df)

Let’s say these are the satisfaction levels of 30 people, 10 of whom are single, 10 married, and 10 divorced. You used the factor command combined with rep to create 10 each of these factors. Now, before you conduct an ANOVA using these factors, let’s say we want to change the factor names to sentence case. Begin by installing the dplyr package if you have not done so already, and load it as a library:
install.packages("dplyr")
library(dplyr)
Next, try the following R code:
df <- df %>% mutate(status=recode(status,
'single' = 'Single',
'married' = 'Married',
'divorced' = 'Divorced'))
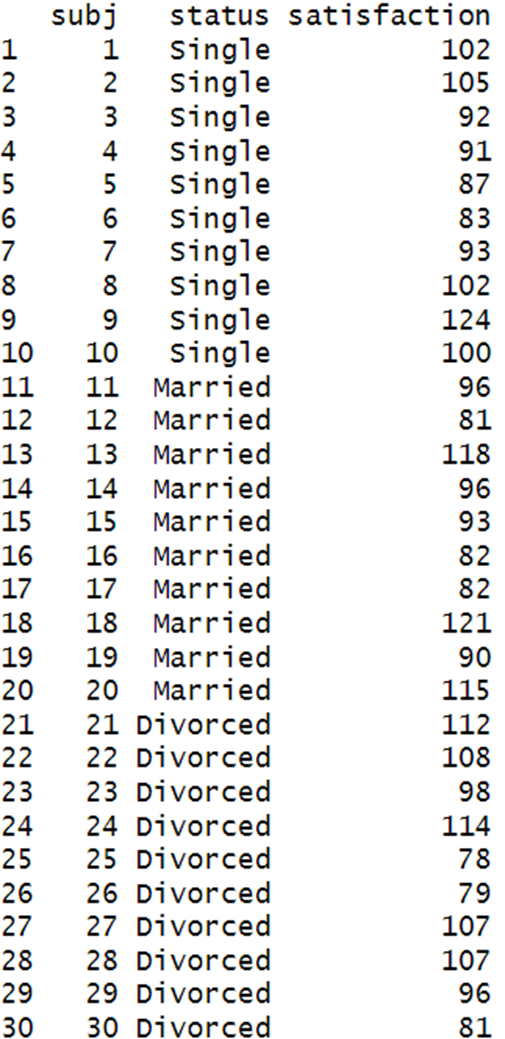
print(df)
That changed the factor names into:

Now that you have a factor with more than 2 levels, you can run an ANOVA followed by a Tukey’s HSD. Try the following R code:
mod.aov <- aov(satisfaction~status, data=df)
summary(mod.aov)
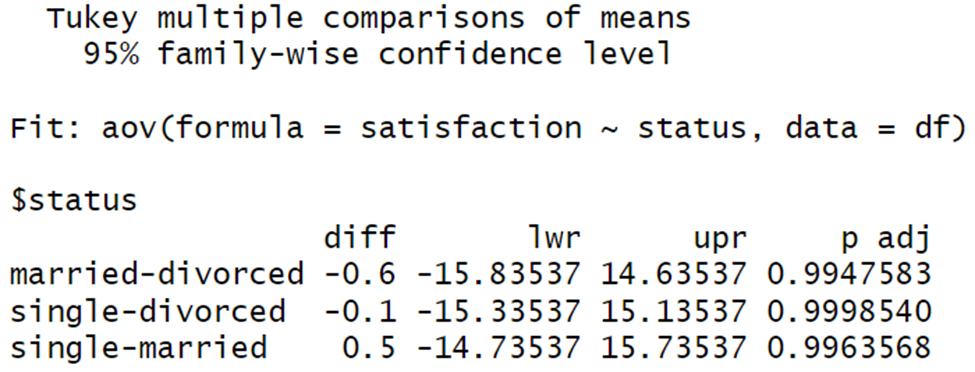
TukeyHSD(mod.aov)

The ANOVA isn’t significant. The Tukey’s pairwise comparisons also show no statistically significant differences between factor level comparisons:

This analysis was only possible because of the existence of a factor variable, status. Now you know how to create your own factor variables in R.
BridgeText can help you with all of your statistical analysis needs.


